
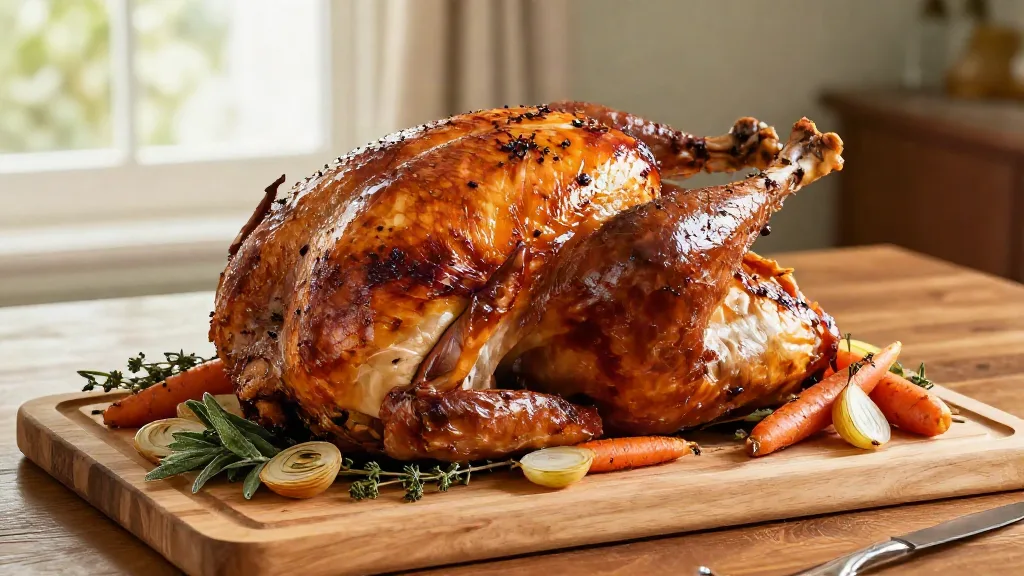
How to Cook a Turkey: The Complete Guide to a Juicy, Perfectly Cooked Bird
The first turkey I ever cooked for a crowd looked like a magazine cover and tasted like sawdust. The breast was dry enough to crumble, and when I carved into the thigh, it was still pink at the bone. Same bird, same oven, two completely different problems. That was the moment I understood that a turkey isn’t one piece of meat. It’s two, and they want different things.
If turkey makes you nervous, you’re in very good company. According to Food Safety News, calls to the USDA Meat and Poultry Hotline double every November, mostly from home cooks with turkey questions. The hotline even stays open on Thanksgiving Day.
My own learning curve was expensive. Over a few years I served one bird that was raw in the middle because it never fully thawed, one that spent so long in the oven the breast turned to cardboard, and one with skin so pale and flabby nobody wanted it. Each of those turkeys cost a full day of work and a table of disappointed people.
If you’ve been planning to roast your turkey by the time printed on the wrapper, or you’re counting on the pop-up timer, please stop right here. Before anything else, read my meat internal temperature chart, because temperature, not time, is what tells you when a turkey is done.
The truth is that great turkey comes down to a handful of decisions: thawing it completely, seasoning it a day ahead, getting the white meat and dark meat to finish together, and pulling it at exactly the right temperature. This guide walks you through every one of them, from the day you buy the bird to the moment you carve it.
Turkey Quick Reference
These are the numbers you’ll want on Thanksgiving morning. All of them come from the USDA’s Let’s Talk Turkey roasting guide unless noted.
Roasting Times at 325°F
| Turkey weight | Unstuffed | Stuffed |
|---|---|---|
| 8–12 lb | 2¾–3 hours | 3–3½ hours |
| 12–14 lb | 3–3¾ hours | 3½–4 hours |
| 14–18 lb | 3¾–4¼ hours | 4–4¼ hours |
| 18–20 lb | 4¼–4½ hours | 4¼–4¾ hours |
| 20–24 lb | 4½–5 hours | 4¾–5¼ hours |
These times are approximate. Use them to plan your day, then use a thermometer to decide when the turkey is done.
The Numbers That Matter
- Safe internal temperature: 165°F in the innermost thigh, the innermost wing and the thickest part of the breast.
- Stuffing: 165°F in the center.
- Oven temperature: no lower than 325°F.
- Rest before carving: at least 20 minutes.
- How much to buy: about 1 pound of whole turkey per person.
Thawing Times
According to University of Nebraska–Lincoln Extension, which follows USDA guidance:
| Turkey weight | In the refrigerator | In cold water |
|---|---|---|
| 4–12 lb | 1–3 days | 2–6 hours |
| 12–16 lb | 3–4 days | 6–8 hours |
| 16–20 lb | 4–5 days | 8–10 hours |
| 20–24 lb | 5–6 days | 10–12 hours |
Why Turkey Is So Hard to Get Right
Before the method, it helps to understand what you’re up against. Once you see the problem clearly, every step in this guide makes sense.
Two Kinds of Meat on One Bird
Turkey breast is lean white meat. It’s safe at 165°F, and every degree past that makes it drier. The thighs and legs are dark meat, full of connective tissue and fat. They’re also safe at 165°F, but they’re far more tender at 175–180°F, when that connective tissue has had time to soften.
So the breast wants to stop cooking at exactly the point where the thighs are just getting good. On top of that, the thighs sit lower in the pan, partly shielded by the body of the bird, and they heat more slowly. In a standard roast, the breast often reaches 165°F while the thighs are still well behind.
Almost every technique in this guide exists to close that gap:
- Spatchcocking puts the thighs out in the open where they get more heat.
- Tenting the breast with foil slows it down.
- A dry brine helps the breast hold its moisture if it runs a few degrees over.
Size and Shape Work Against You
A 16-pound turkey is a big, uneven object. By the time heat reaches the center of the thickest part, the outer layers have been cooking for hours. That’s why turkey takes a lower oven temperature than chicken, and why the outside can look perfectly done long before the inside is safe.
Color Doesn’t Tell You Anything
Golden skin tells you the outside is browned, nothing more. The meat near the bone can look pink even when it’s fully cooked, especially in a younger bird or a smoked turkey, and pale meat can still be under temperature. The USDA’s thermometer guidance is clear: the only reliable way to know a turkey is done is to measure its internal temperature.
AVOID THIS: Don’t rely on the pop-up timer. The USDA notes that pop-up indicators are reasonably accurate when placed well, but they’re usually in the breast, and they tell you nothing about the thigh, which cooks last. Always confirm with a real thermometer.
Choosing Your Turkey
Good results start at the store. Here’s what to decide before you buy.
How Big a Turkey to Buy
The USDA recommends about 1 pound of whole turkey per person. That covers the bones and gives most families some leftovers. If leftovers are a big part of your holiday, plan on 1½ pounds per person.
For more than about 16 guests, consider two smaller turkeys instead of one giant bird. Two 12-pound turkeys cook faster and more evenly than one 24-pound turkey, and they fit side by side in most ovens.
Fresh or Frozen
Both work well, and I’ve cooked plenty of each. The differences are mostly about planning:
- Frozen turkeys are cheaper, easier to find and can be bought weeks ahead. They need several days in the fridge to thaw.
- Fresh turkeys skip the thawing step, but they need to be cooked within a day or two of purchase. Buy one only 1 to 2 days before you plan to cook.
Read the Label: Enhanced, Basted and Kosher Birds
Many supermarket turkeys are labeled “basted,” “self-basting,” “enhanced” or “contains up to X% of a solution.” That means they’ve already been injected with a salty solution. Kosher turkeys have also been salted during processing.
These birds are already seasoned, so don’t brine them. A brine on top of an already salted bird can make it unpleasantly salty. If you want to brine, look for a turkey labeled “natural” or with no added solution.
Turkey Breast Instead of a Whole Bird
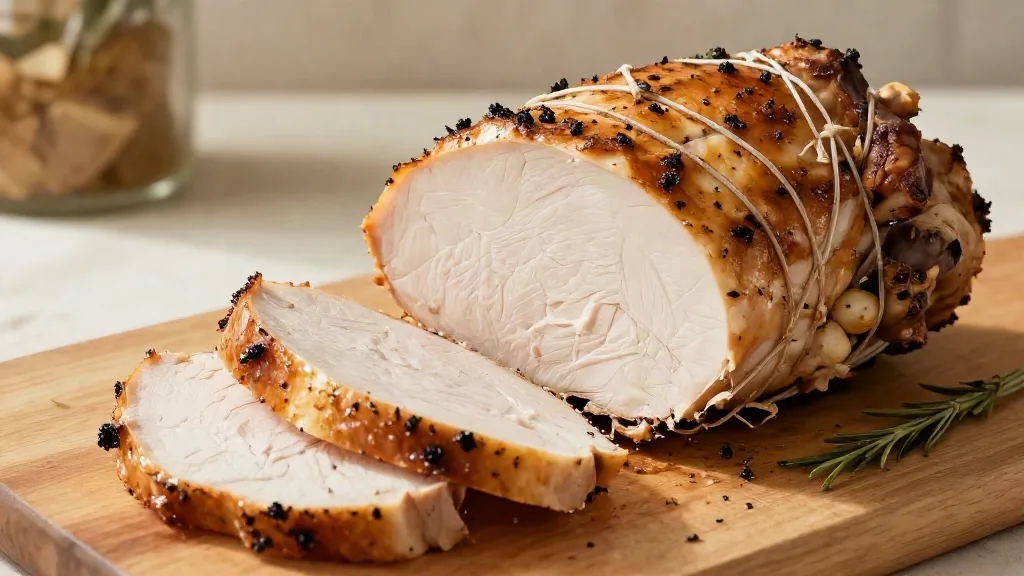
For a small group, or for anyone who only eats white meat, a bone-in or boneless turkey breast is a great choice. It cooks in a fraction of the time and avoids the white-meat-versus-dark-meat problem entirely. I cover it in detail in my guide to roasting a turkey breast.
Thawing Your Turkey Safely
This is the step that causes the most problems, and it starts days before you cook. A partially frozen turkey cooks unevenly: the outside finishes while the center lags behind, sometimes by an hour or more.
The Refrigerator Method (Best)
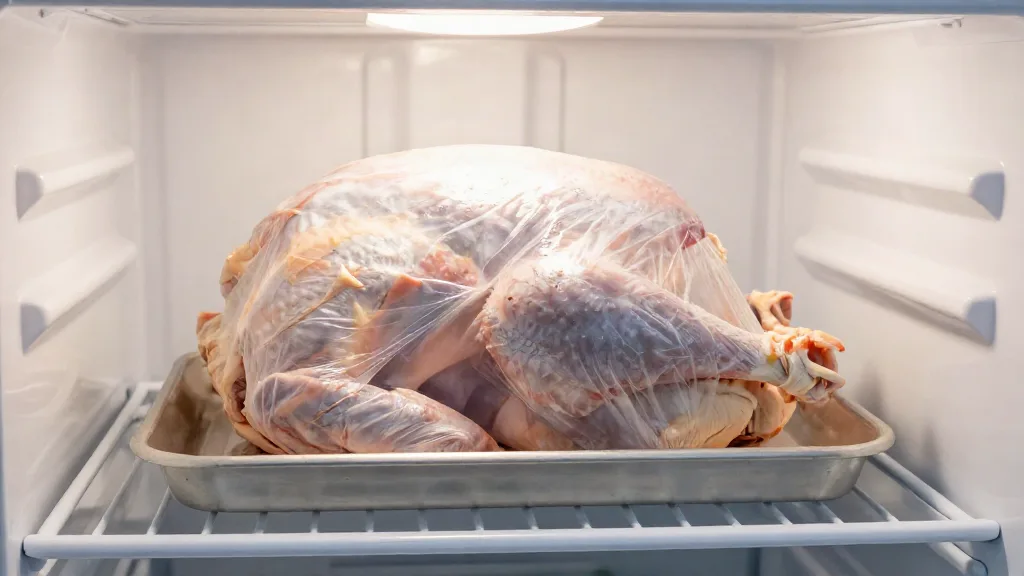
This is the safest and easiest method, and it’s the one I use every year. It just takes time.
- Allow about 24 hours for every 4 to 5 pounds of turkey.
- Keep the turkey in its original wrapper, on a sheet pan or in a roasting pan to catch any drips.
- Put it on the lowest shelf, so nothing can drip onto other food.
- Once thawed, a turkey keeps in the fridge for 1 to 2 more days.
For a 16-pound turkey, that means moving it from the freezer to the fridge on the Saturday or Sunday before Thanksgiving.
The Cold Water Method (Faster)
If you’re short on time, cold water thawing is much faster, but it takes more attention.
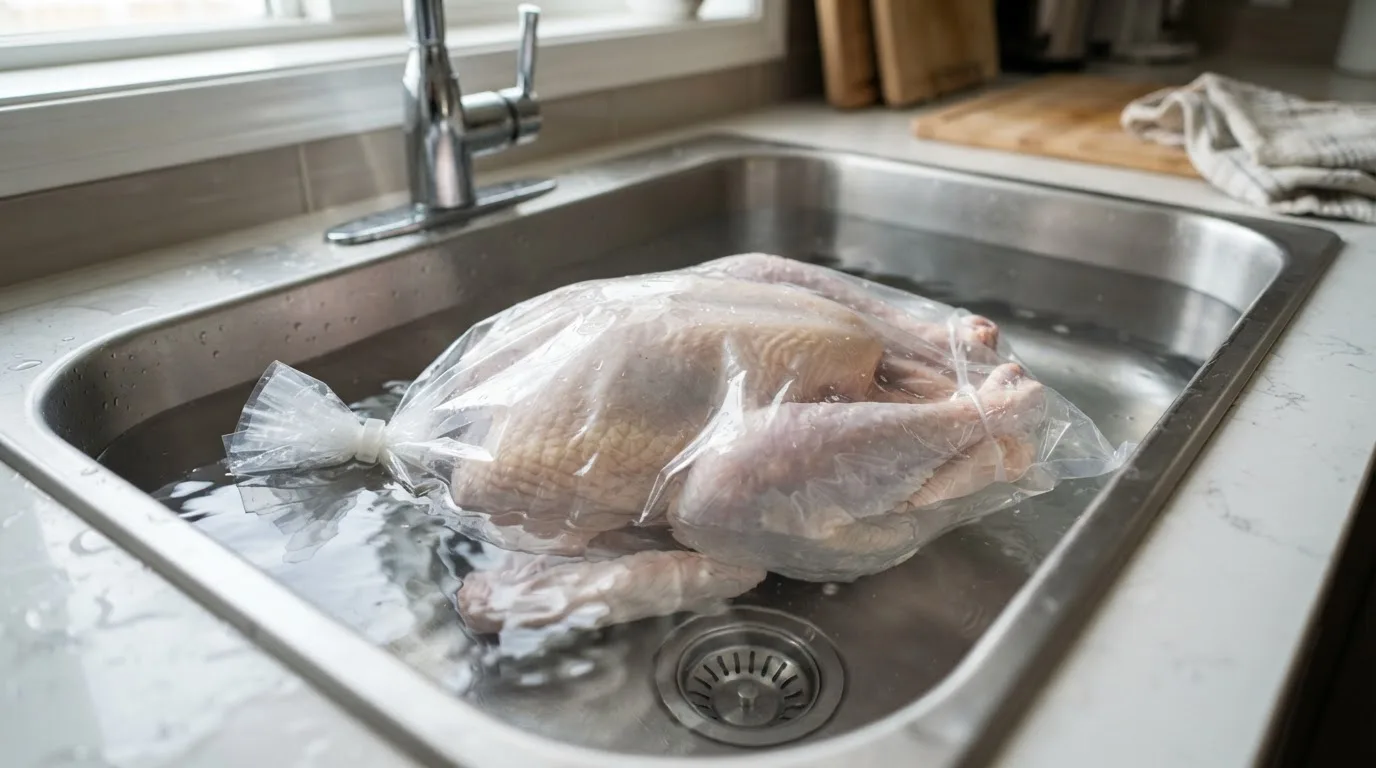
- Make sure the turkey is in a leak-proof bag, so water can’t get in and the turkey’s juices can’t get out.
- Submerge it completely in cold tap water.
- Change the water every 30 minutes so it stays cold.
- Allow about 30 minutes per pound.
- Cook the turkey as soon as it’s thawed.
The Microwave Method
Some smaller turkeys can be thawed in the microwave. Check your microwave’s manual for the size limit and power settings, and cook the turkey immediately afterward, because parts of it may have started to cook.
What Not to Do
Never thaw a turkey on the counter, in the garage or on the porch. The outside warms into the temperature range where bacteria multiply quickly long before the inside thaws. Food Safety News reports that USDA hotline staff regularly warn callers that bathtubs, toilets and washing machines are not safe places to thaw or brine a turkey either.
Forgot to Thaw It?
You can cook a turkey straight from frozen. The USDA says to allow at least 50% more time than for a thawed bird, and to remove the giblet packages with tongs partway through cooking, once they’ve loosened. It’s not my favorite way to cook a turkey, but it’s safe, and it’s better than serving dinner at midnight. My full guide to how to thaw a turkey includes a thawing calculator by weight.
METHOD TIP: Work backward from your dinner time and write the thaw date on your calendar the day you buy the turkey. For a Thursday dinner, a 20-pound bird needs to be in the fridge by Friday or Saturday the week before.
Preparing the Turkey
Prep is where most of the flavor and juiciness is decided. Do it the day before and Thanksgiving morning gets much calmer.
Remove the Giblets and Neck
Reach into both cavities, the main body cavity and the smaller neck cavity under the skin flap. You’ll usually find a bag of giblets in one and the neck in the other. Set them aside for gravy and stock.
Don’t Rinse the Turkey
Rinsing raw poultry doesn’t make it cleaner. It spreads bacteria. In the USDA’s poultry washing study, 60% of people who washed raw poultry had bacteria in their sink afterward, and 26% transferred bacteria to the salad lettuce they prepared next. Cooking to 165°F is what makes the turkey safe.
Instead, pat the turkey dry with paper towels, inside and out, then wash your hands, the sink and anything else the turkey touched with hot, soapy water.
Dry Brine: My Default Method
A dry brine is simply salt applied a day or two ahead. The salt draws moisture out of the meat, dissolves in it, and is then reabsorbed. Over time it seasons the meat deeply and helps it hold onto more moisture as it cooks. The skin also dries out in the fridge, which is the secret to crisp skin.
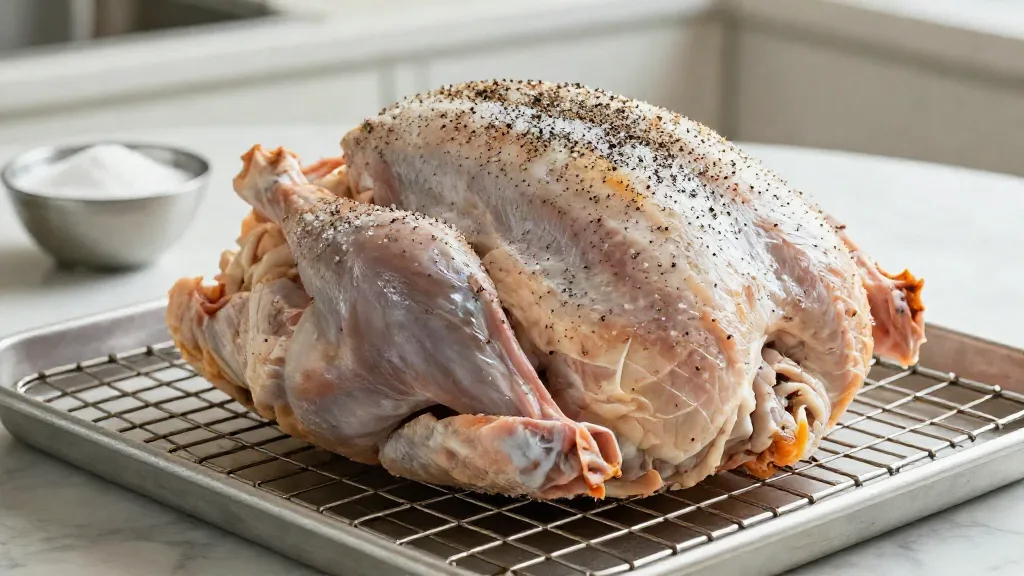
How I dry brine a turkey:
- Pat the thawed turkey completely dry.
- Use about 1 tablespoon of kosher salt for every 4 to 5 pounds of turkey. If you’re using fine table salt, use about half as much, since it’s much saltier by volume.
- Sprinkle the salt evenly over the whole bird, including the back and inside the cavity. Season the breast and thighs a little more heavily, as they’re the thickest parts.
- Put the turkey on a rack set over a sheet pan and refrigerate it, uncovered, for 24 to 48 hours.
- Don’t rinse it before roasting. Just pat off any moisture on the surface.
I explain the timing for every size of bird in my full guide to dry brining a turkey.
Wet Brine: The Classic Alternative
A wet brine means soaking the turkey in salted water. It works, but it’s harder to manage at home, because you need a large container and a way to keep the whole thing at 40°F or below.
University of Illinois Extension recommends:
- Ratio: 4 cups of kosher salt (or 2 cups of table salt) and 1 cup of sugar dissolved in 2 gallons of cold water.
- Time: 6 to 8 hours, or use half the salt and sugar for an overnight soak.
- Temperature: keep the turkey and brine at 40°F or below the whole time, in the fridge or in a cooler with plenty of ice packs.
- Afterward: rinse, pat dry and, if you have time, refrigerate the turkey uncovered overnight to dry the skin.
Because a wet-brined turkey needs to be rinsed, take extra care to clean your sink and surroundings afterward. This is one reason I prefer the dry brine.
AVOID THIS: Never brine a turkey that’s labeled basted, self-basting, enhanced or kosher. It’s already been salted, and brining it again will make it too salty to enjoy.
Butter Under the Skin
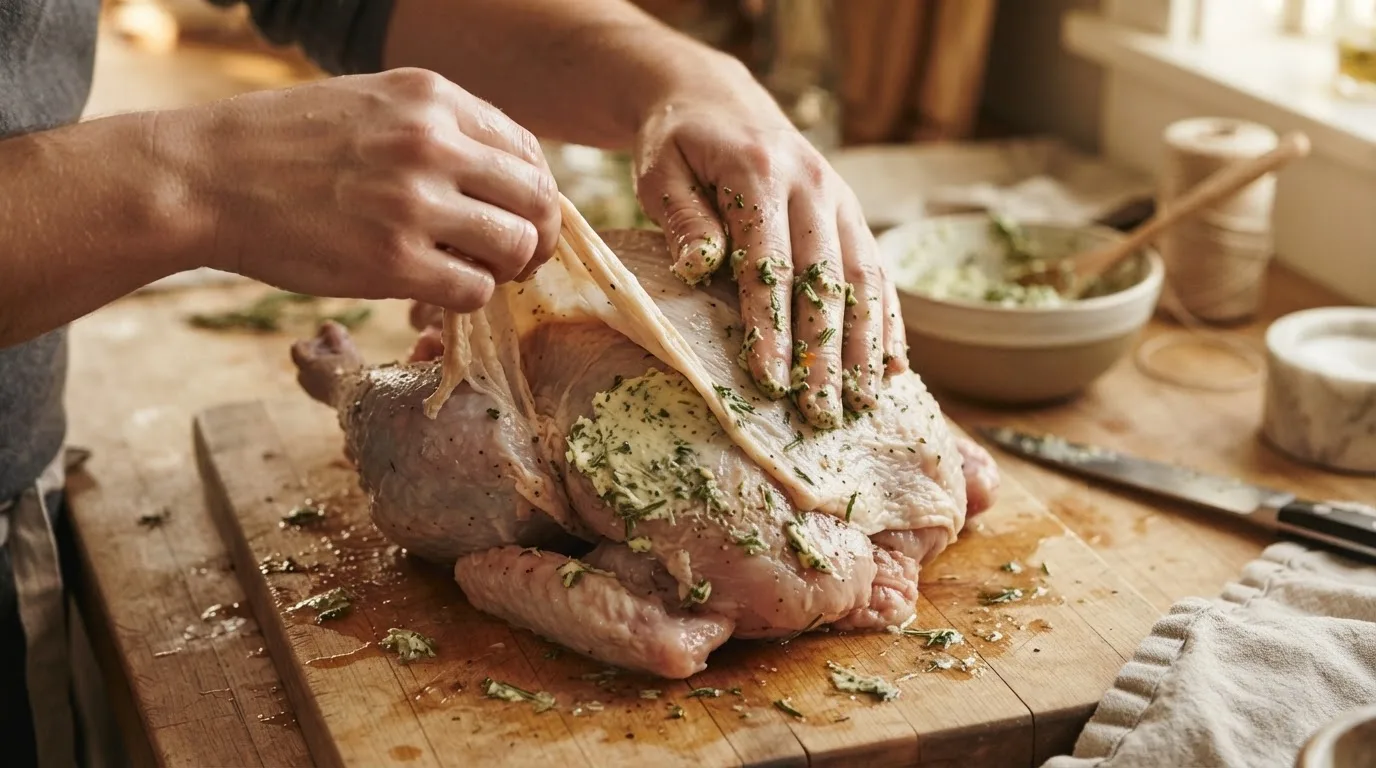
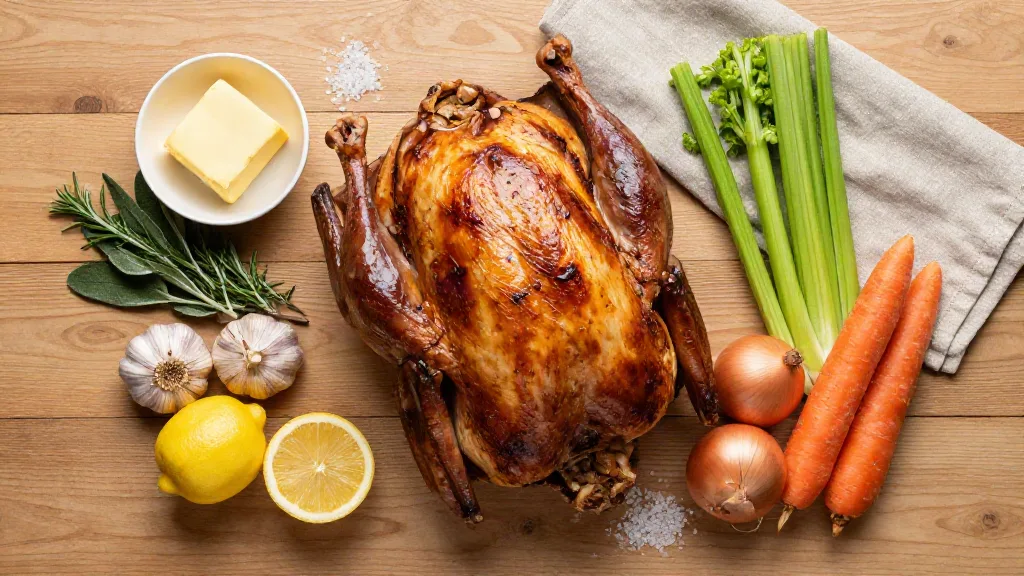
For extra flavor and browning, I spread herb butter under the skin of the breast. Gently slide your fingers between the skin and the meat, starting at the cavity end, to loosen it. Then push softened butter mixed with chopped herbs and garlic underneath and massage it evenly over the breast.
Truss, Tuck and Set Up the Pan
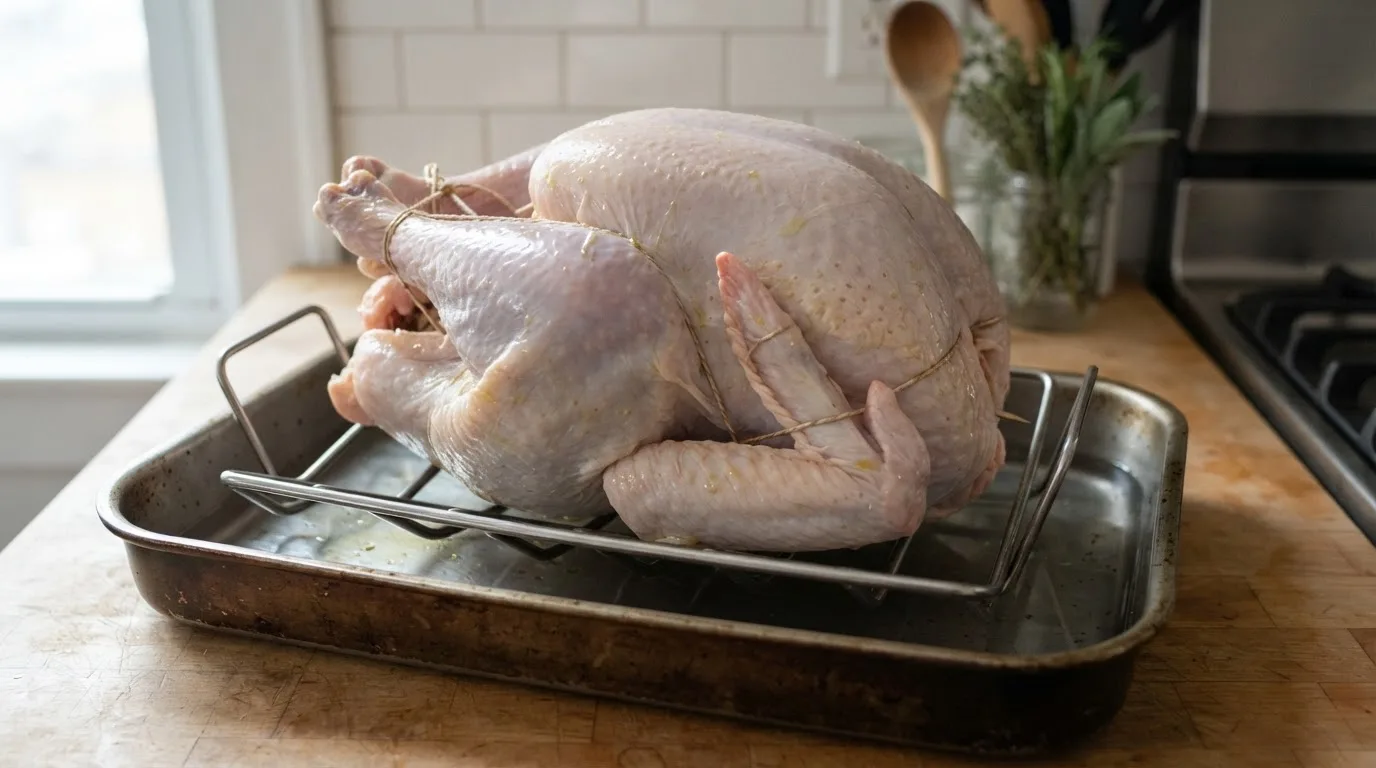
- Tuck the wing tips under the shoulders. The USDA calls this the “akimbo” position. It keeps the tips from burning and helps the bird sit flat.
- Trussing the legs is optional. A loose tie keeps the bird neat, but a tight truss shields the inner thighs and slows them down. I tie the legs loosely, or not at all.
- Use a shallow roasting pan with a rack, so hot air can reach the underside of the bird. The USDA recommends adding about ½ cup of water to the bottom of the pan.
METHOD TIP: Take the turkey out of the fridge about an hour before it goes into the oven. Taking the chill off the outer layers helps it cook a little more evenly. Don’t leave it out longer than that.
Roasting Methods
There’s more than one way to roast a turkey, and the right one depends on how much time you have, your oven and how you want the turkey to look on the table.
Method 1: The Classic Whole Roast at 325°F
This is the traditional, picture-perfect method, and it’s the one the USDA timetable is based on.
- Heat the oven to 325°F. The USDA advises never going lower than that.
- Place the turkey breast-side up on a rack in a shallow roasting pan, with about ½ cup of water in the bottom.
- Brush or rub the skin with softened butter or oil.
- Tent the breast with foil for the first 1 to 1½ hours, as the USDA recommends. This slows the breast down while the thighs catch up.
- Remove the foil for the rest of the cooking time so the skin can brown. If parts of it brown too fast, cover just those parts with small pieces of foil.
- Start checking the temperature about 45 minutes before the timetable says it should be done.
- Remove the turkey when all three test spots reach 165°F.
Method 2: Spatchcock Turkey at 425°F
Spatchcocking means cutting out the backbone and pressing the turkey flat. It’s my favorite way to cook a turkey for anyone who cares more about how it tastes than how it looks whole on the platter.
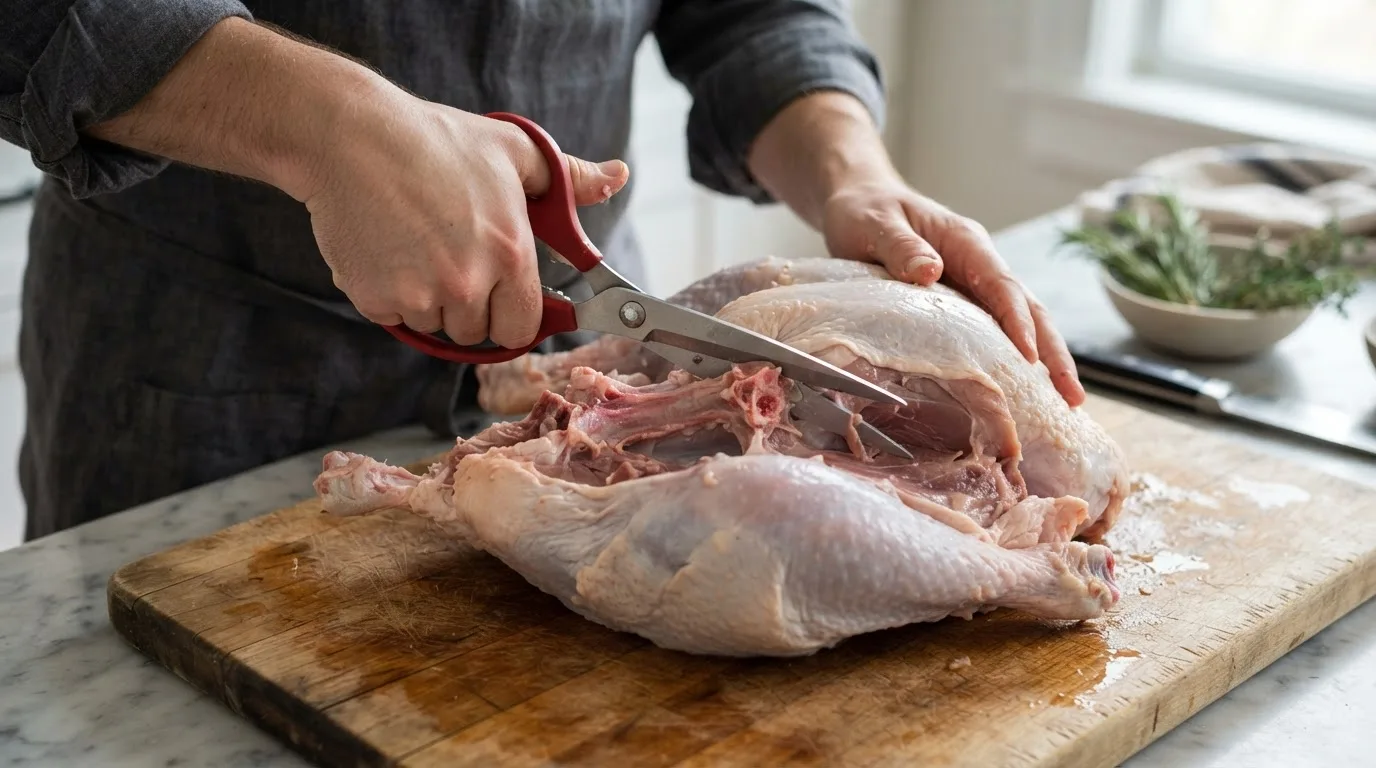
Here’s why it works so well:
- It’s much faster. ThermoWorks roasted a 16-pound spatchcocked turkey at 425°F in about 90 minutes. The USDA timetable puts a whole, unstuffed turkey of that size at roughly 4 hours at 325°F.
- It cooks more evenly. With the bird flat, the thighs are fully exposed to the heat, so they finish closer to the same time as the breast.
- All the skin faces up, so you get crisp, golden skin over the whole bird.
How to spatchcock a turkey:
- Place the turkey breast-side down on a large cutting board.
- Using sturdy poultry shears, cut along both sides of the backbone and remove it. Save it for stock.
- Turn the turkey over and press down firmly on the breastbone with the heels of your hands until it cracks and the bird lies flat.
- Tuck the wing tips behind the breast.
- Lay the turkey on a rack over a sheet pan, or on a bed of chopped onions, carrots and celery, and roast at 425°F until the breast and thighs reach temperature.
I use the same technique for chicken, which I cover in my guide on how to cook chicken.
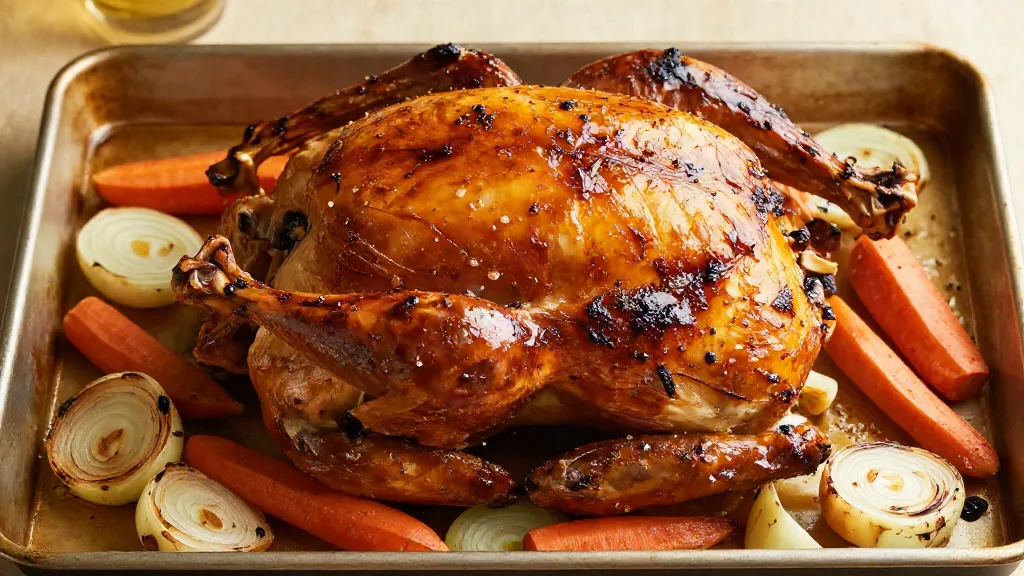
AVOID THIS: Cutting through a turkey backbone takes real force. Use heavy-duty poultry shears, not kitchen scissors, and keep the bird steady on a board with a damp towel underneath so it can’t slide.
Method 3: Roasting a Turkey Breast
A bone-in turkey breast roasts at 325°F in about 1½ to 3¼ hours depending on size, according to the USDA timetable for 4- to 8-pound breasts. Check the thickest part, away from the bone, and pull it at 165°F. It’s the easiest way to serve turkey for a small group, and the meat comes out remarkably juicy because there’s no dark meat to wait for.
Temperature: Knowing When the Turkey Is Done
This is the part that makes or breaks the whole meal. If you take only one thing from this guide, make it this section.
Where to Check
The USDA recommends checking three places, and every one should reach 165°F:
- The innermost part of the thigh, near the body but not touching bone. This is usually the last spot to get there.
- The innermost part of the wing.
- The thickest part of the breast, inserted from the side.
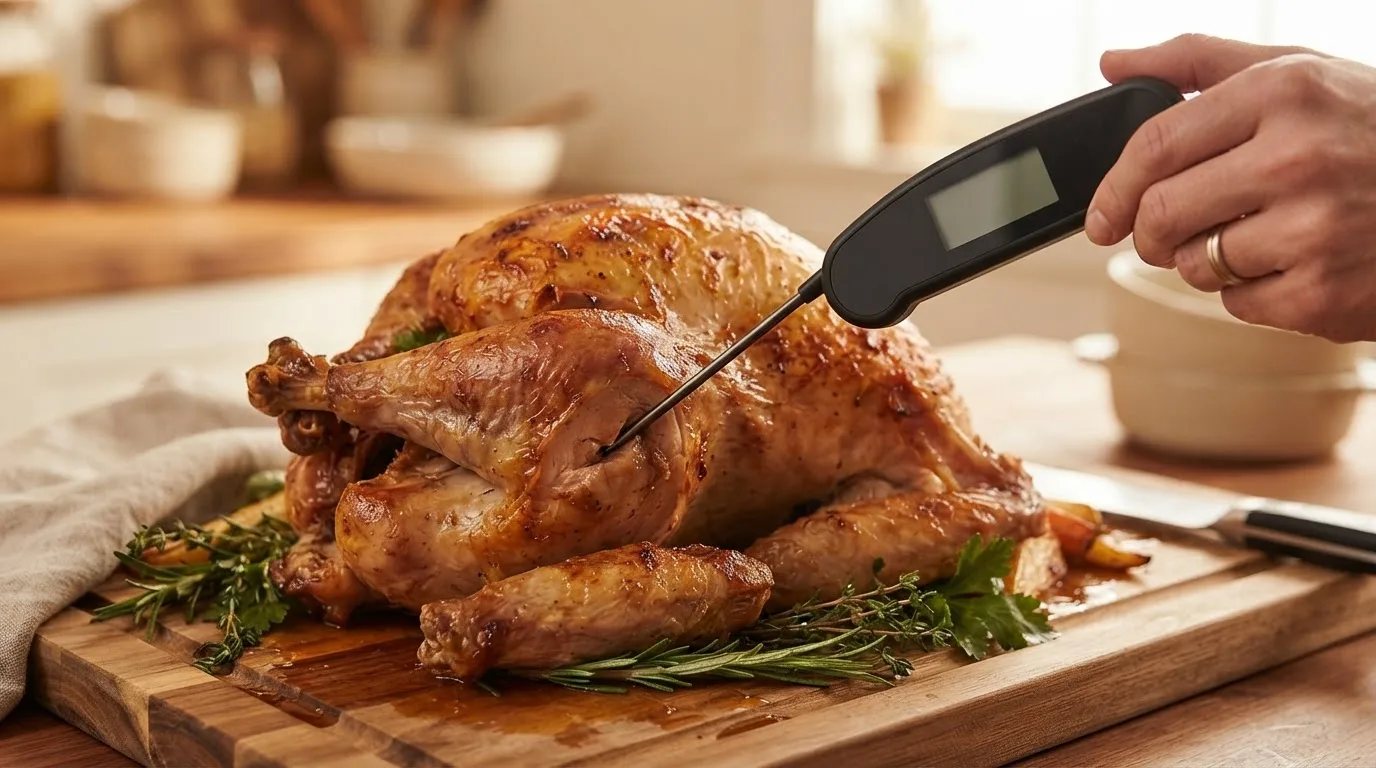
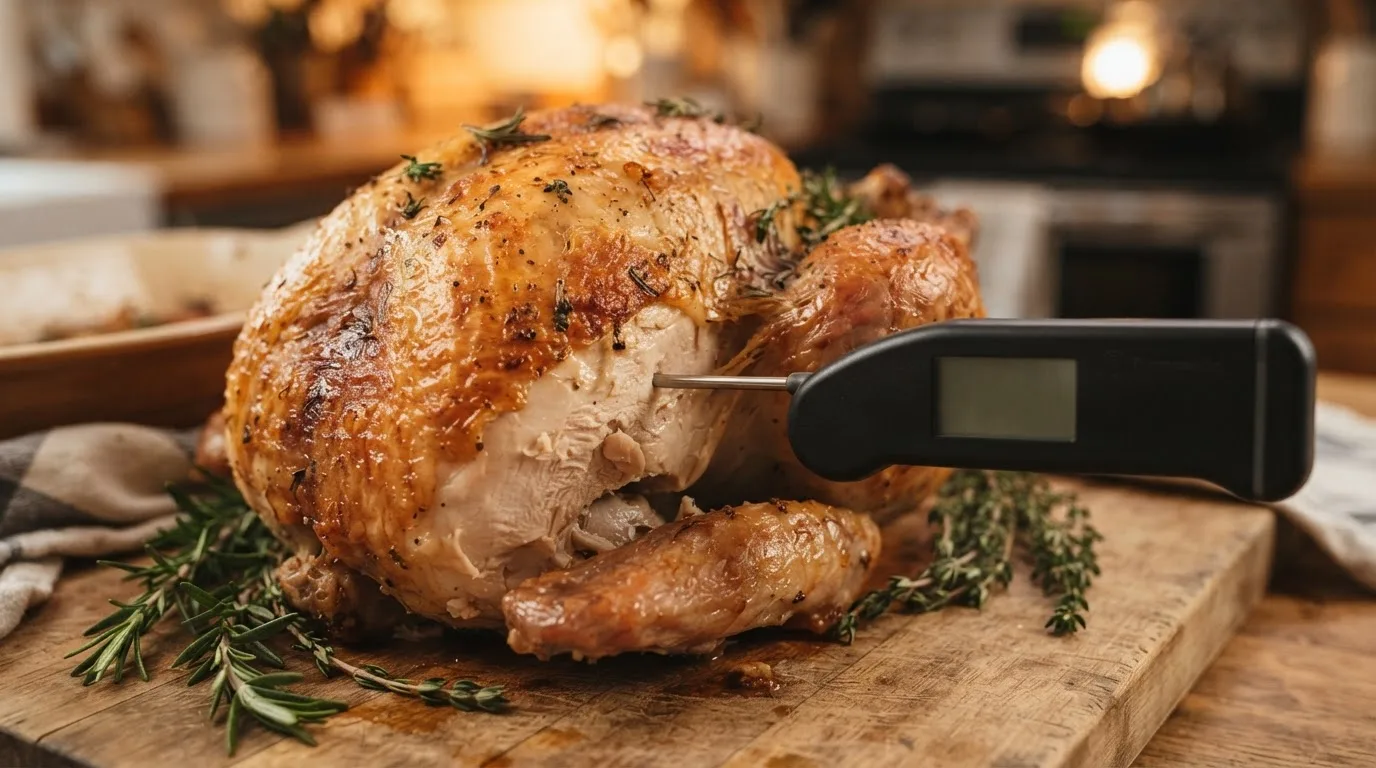
Bone conducts heat and gives you a falsely high reading, so make sure the tip of the probe sits in the meat. If you get different readings in the same area, trust the lowest one.
Leave-In Probes Make It Easier
A leave-in probe thermometer is the best tool for a whole turkey. The USDA suggests placing an oven-safe probe in the thickest part of the inner thigh at the start. When it reaches 165°F, check the breast and wing with an instant-read thermometer. With an alarm set, you never have to keep opening the oven door and letting heat out.
Breast and Thigh Targets
Here’s how I handle the two kinds of meat:
| Part | Minimum safe temperature | My target |
|---|---|---|
| Breast | 165°F | 165°F, and no higher |
| Thigh | 165°F | 175–180°F for tender dark meat |
You’ll see some cooks and test kitchens pull the breast at 150–155°F and rely on carryover and time-at-temperature to make it safe. The science behind that is real, and I explain it in my meat internal temperature chart, but I don’t count on carryover for poultry safety in a home kitchen. My rule is simple: every test spot reads 165°F before the turkey leaves the oven.
Carryover Cooking
A whole turkey keeps cooking after it comes out of the oven. During a 20- to 30-minute rest, the internal temperature can climb several more degrees. This is why the breast of a turkey cooked to 165°F still tastes juicy, while one cooked to 180°F in the oven ends up at well over 180°F by the time it’s carved.
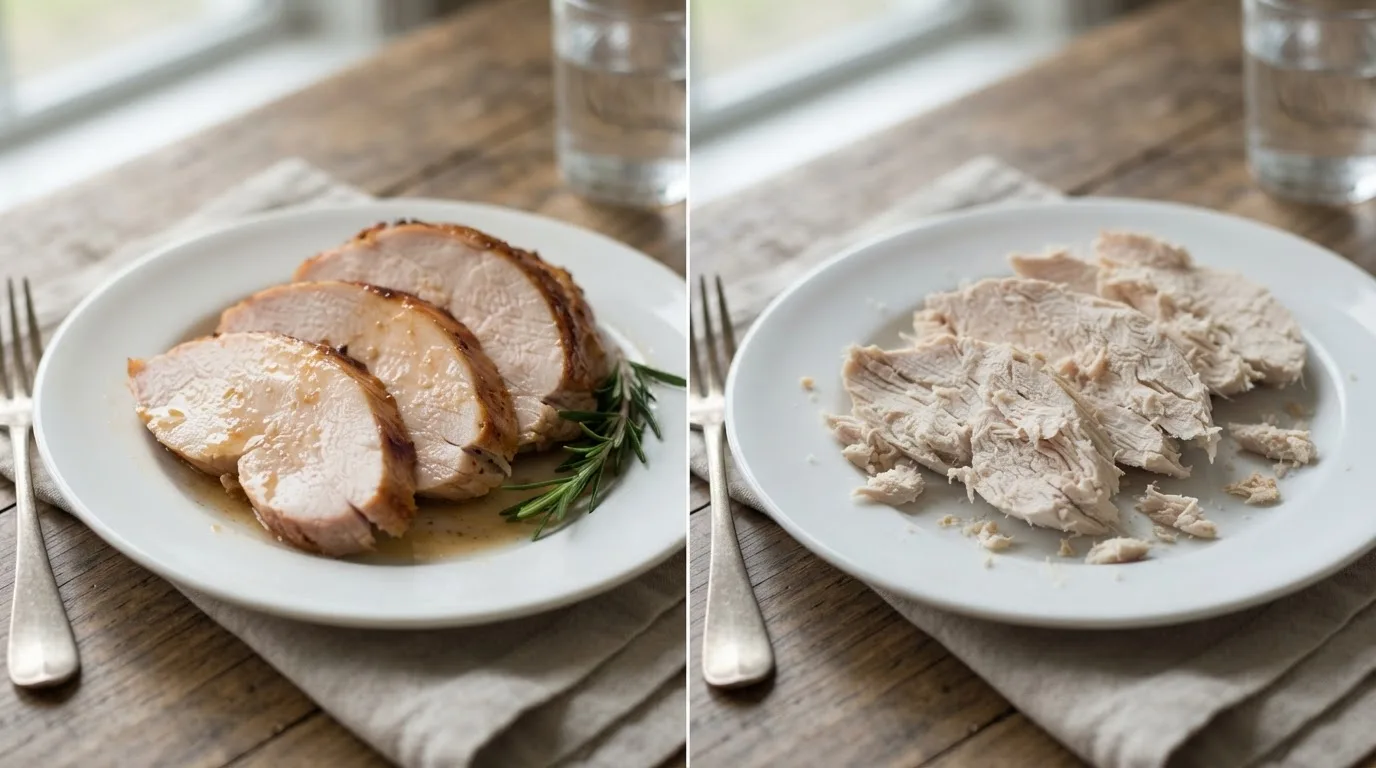
METHOD TIP: If the breast reaches 165°F while the thighs are still behind, cover the breast loosely with foil and keep roasting. The foil slows the breast down while the thighs catch up.
Stuffing: Inside the Bird or on the Side?
Stuffing cooked inside a turkey soaks up the juices and is undeniably delicious. It also makes the turkey much harder to cook well.
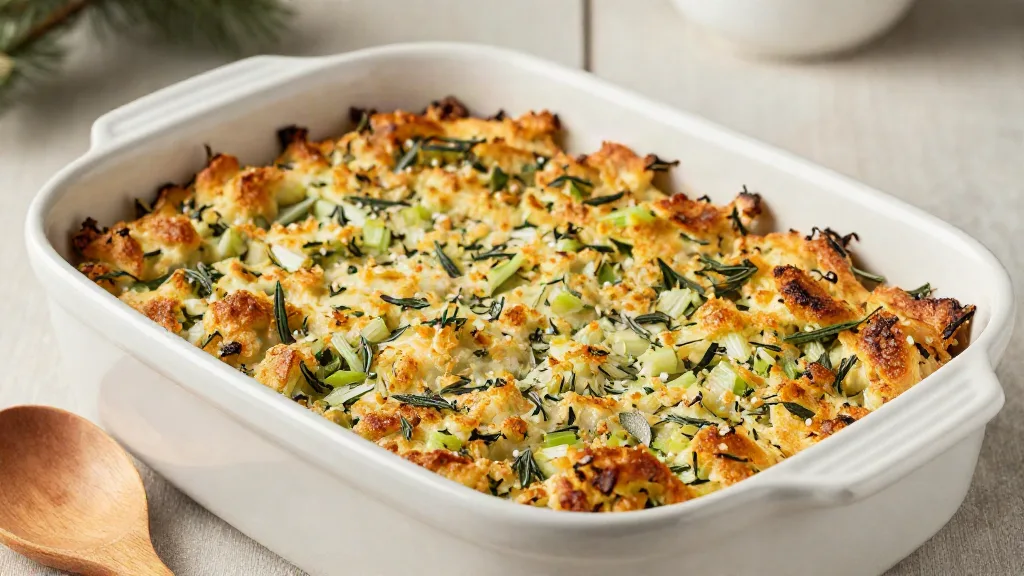
Why I Bake It Separately
Stuffing in the cavity is insulated by the bird around it, so it heats slowly. To make it safe, the center of the stuffing must reach 165°F, and by the time it does, the breast is almost always overcooked. The USDA recommends cooking stuffing separately in a casserole dish for this reason, and it’s what I do every year.
For the flavor of stuffing cooked inside the bird, drizzle the stuffing with a little turkey drippings or stock before it goes in the oven.
If You Stuff the Turkey Anyway
If stuffed turkey is a family tradition, follow the USDA’s rules:
- Prepare the wet and dry ingredients separately and refrigerate the wet ones. Combine them only right before you stuff the bird.
- Stuff the turkey loosely, just before it goes into the oven. Never stuff a turkey the night before.
- Allow extra time, as shown in the stuffed column of the timetable.
- Check that the center of the stuffing reaches 165°F.
- Remove all the stuffing from the cavity as soon as the turkey comes out of the oven.
Resting and Carving
The turkey is out of the oven and smells incredible. Don’t carve it yet.
Rest for at Least 20 Minutes
The USDA recommends letting a turkey stand for 20 minutes before carving. For a large bird I rest it for 30 to 40 minutes, loosely tented with foil. It stays hot for longer than you’d expect, and the rest gives you time to make the gravy and get the sides on the table.
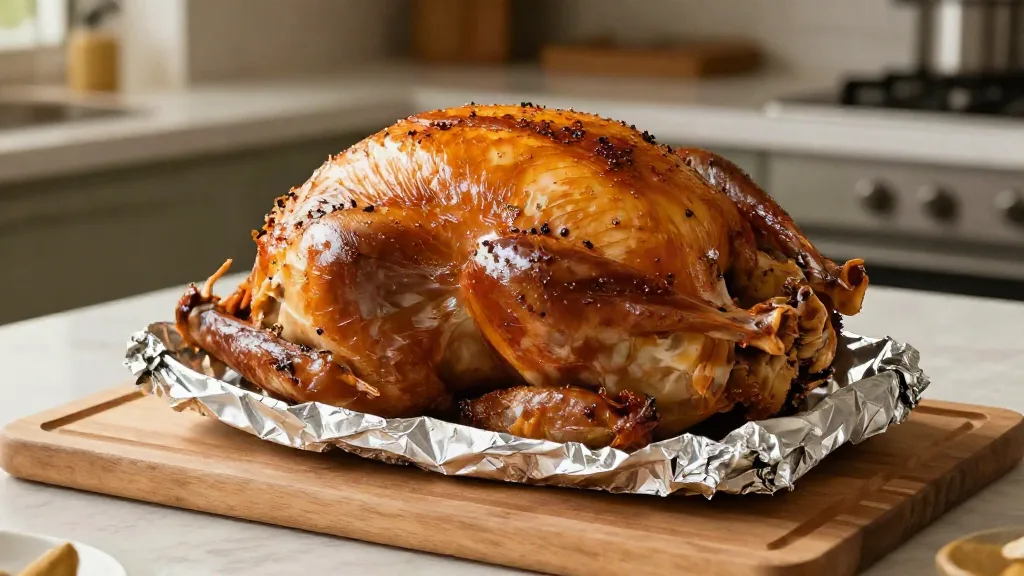
Keep the foil tent loose. Wrapping the turkey tightly traps steam and softens the skin you worked to crisp.
How to Carve a Turkey
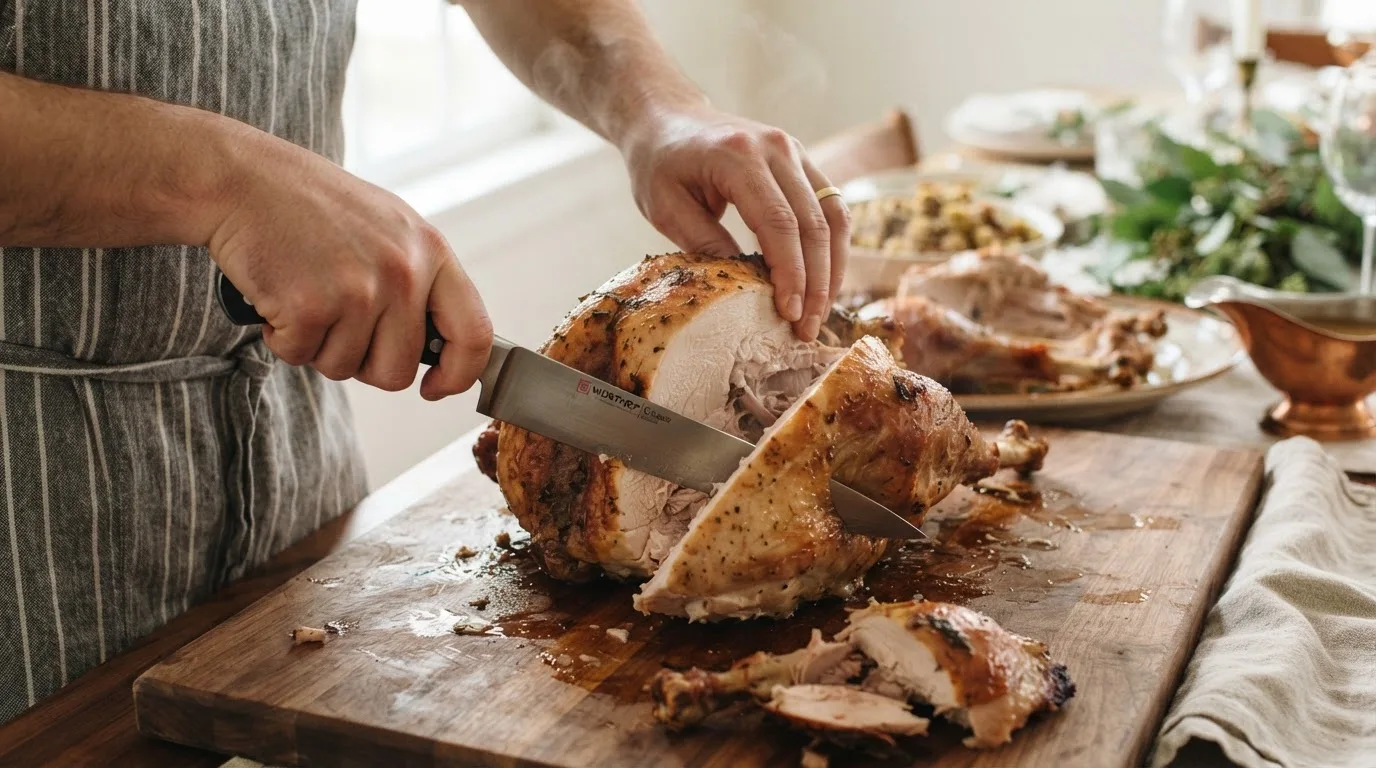
Carving is much easier in the kitchen than at the table. Here’s the method I use:
- Remove the legs. Pull each leg away from the body and cut through the skin. Bend the leg back until the hip joint pops, then cut through the joint.
- Separate the drumsticks and thighs. Cut through the joint between them. Slice the thigh meat off the bone, or serve it whole.
- Remove the wings. Pull each wing out and cut through the joint where it meets the body.
- Remove each breast half in one piece. Cut down along one side of the breastbone, then follow the rib cage with your knife, gently pulling the breast away as you go.
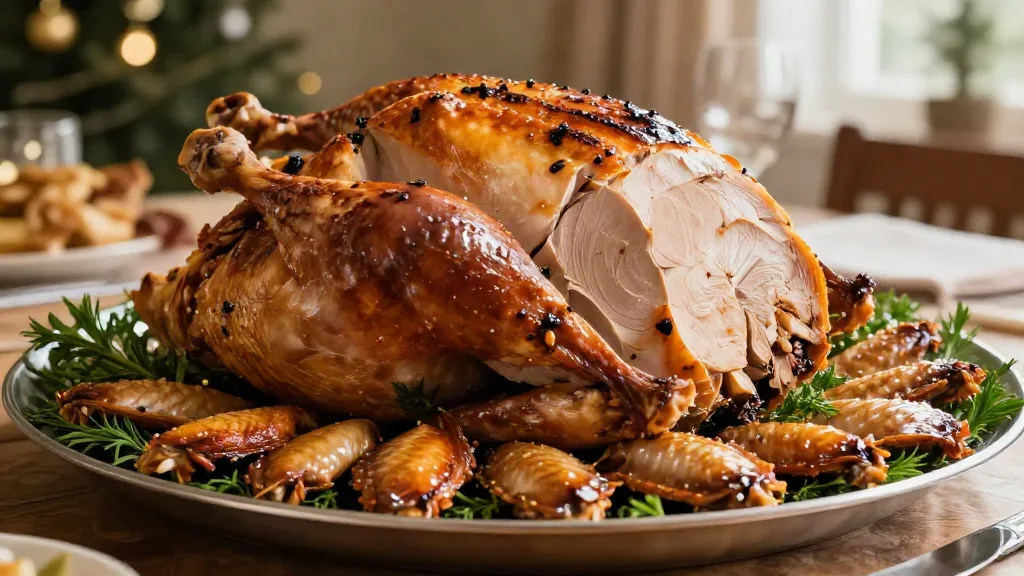
- Slice the breast across the grain into ½-inch slices. This gives you tender, even slices with skin on every piece.
Making Gravy From the Drippings
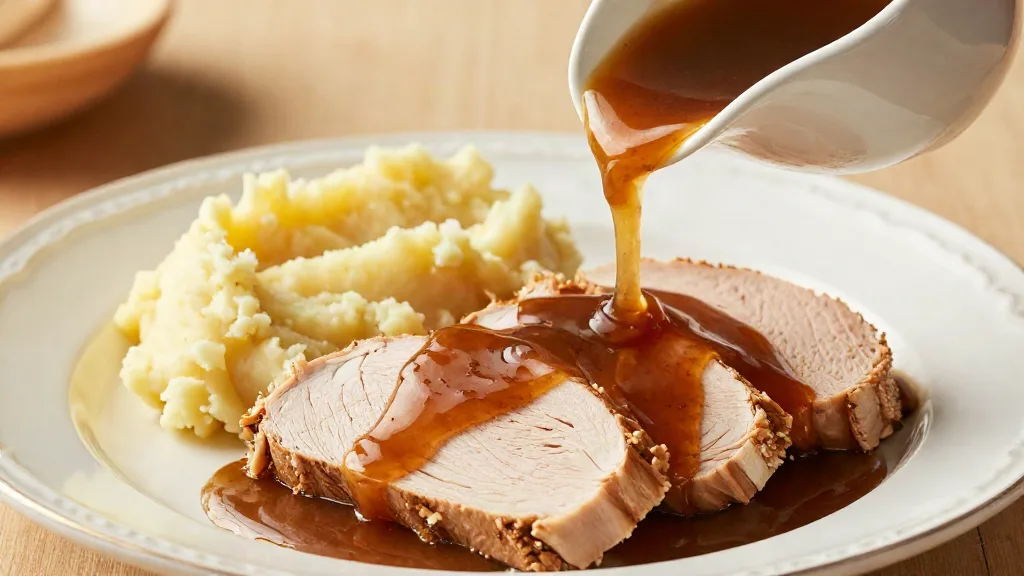
While the turkey rests, pour the pan drippings into a measuring cup and let the fat rise to the top. Spoon off the fat, then whisk a few tablespoons of it in a saucepan with an equal amount of flour for a minute or two. Gradually whisk in the defatted drippings and turkey stock, and simmer until thickened. Season to taste. The USDA recommends bringing gravy to a rolling boil when you reheat it later.
Other Ways to Cook a Turkey
Roasting isn’t the only option. These methods have devoted fans, but each comes with its own rules.
Deep-Fried Turkey
Deep-fried turkey is juicy, crisp and fast. It’s also the most dangerous way to cook a turkey. According to the NFPA, Thanksgiving is the leading day of the year for home cooking fires, with an estimated 1,446 reported in 2023.
University of Georgia Extension recommends these precautions:
- Use the fryer outdoors only, on a flat surface, well away from buildings. Never use one on a wooden deck or in a garage.
- Measure the oil level first by putting the turkey in the empty pot with water, removing it, and marking the water line. Dry the pot completely before adding oil.
- Make sure the turkey is fully thawed and completely dry. Water hitting hot oil can cause the oil to boil over and catch fire.
- Heat the oil to 365–375°F and allow about 3 minutes per pound.
- Check the temperature in several places.
Smoked Turkey
Smoking a turkey at a low temperature gives it deep flavor, but it takes longer and the skin tends to be rubbery unless you finish it at a higher heat. Smoked turkey meat often stays pink even when fully cooked, so the thermometer matters more than ever. I recommend smoking at 275°F or higher, so the bird doesn’t spend too long at low temperatures.
Leftovers: Storing and Reheating Safely
Leftovers are half the point of a turkey. Here’s how to keep them safe, following the USDA’s leftover guidelines.
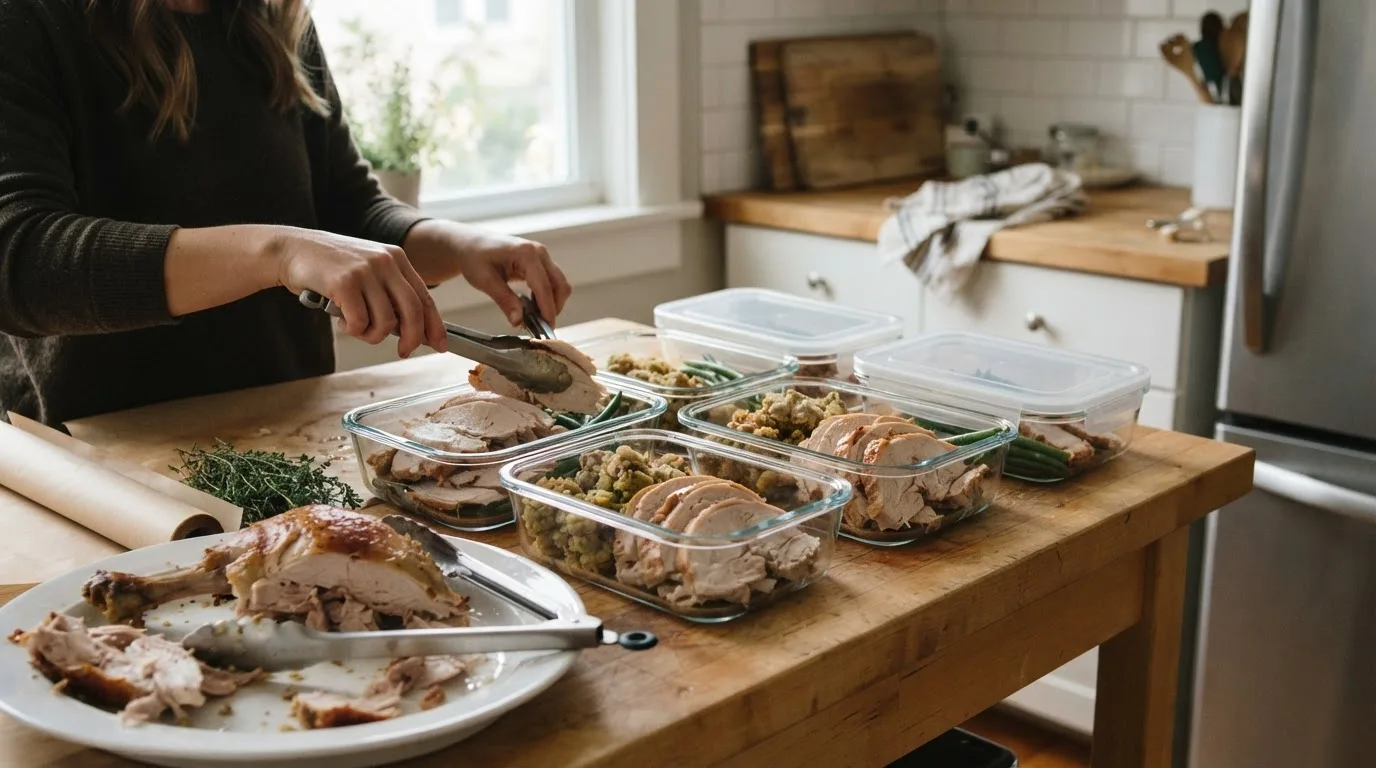
- Refrigerate within 2 hours. Don’t leave the turkey on the table for the rest of the evening.
- Carve it off the bone first and divide it into shallow containers so it cools quickly.
- Use within 3 to 4 days. This applies to the turkey, stuffing and gravy.
- Freeze for longer storage. Plain turkey keeps its quality for about 4 months in the freezer, or about 6 months covered in broth or gravy.
- Reheat to 165°F, or until steaming hot throughout. Bring gravy to a rolling boil.
Troubleshooting Common Turkey Problems
Even careful cooks run into these. Here’s what causes each one and how to fix it.
The Breast Is Dry
This is the most common turkey complaint, and it almost always means the breast went well past 165°F, usually while waiting for the thighs.
Fix it next time:
- Dry brine the turkey 24 to 48 hours ahead.
- Tent the breast with foil for the first 1 to 1½ hours.
- Spatchcock the turkey so the breast and thighs finish together.
- Start checking the temperature 45 minutes before the timetable says it’s done.
The Breast Is Done but the Thighs Aren’t
Fix it now: Cover the breast with foil and return the turkey to the oven until the thighs reach temperature. If you’re short on time, remove the legs, put them back in the oven on a sheet pan, and carve the breast while they finish.
Fix it next time: Spatchcock the turkey, and don’t truss the legs tightly against the body.
The Skin Is Pale and Flabby
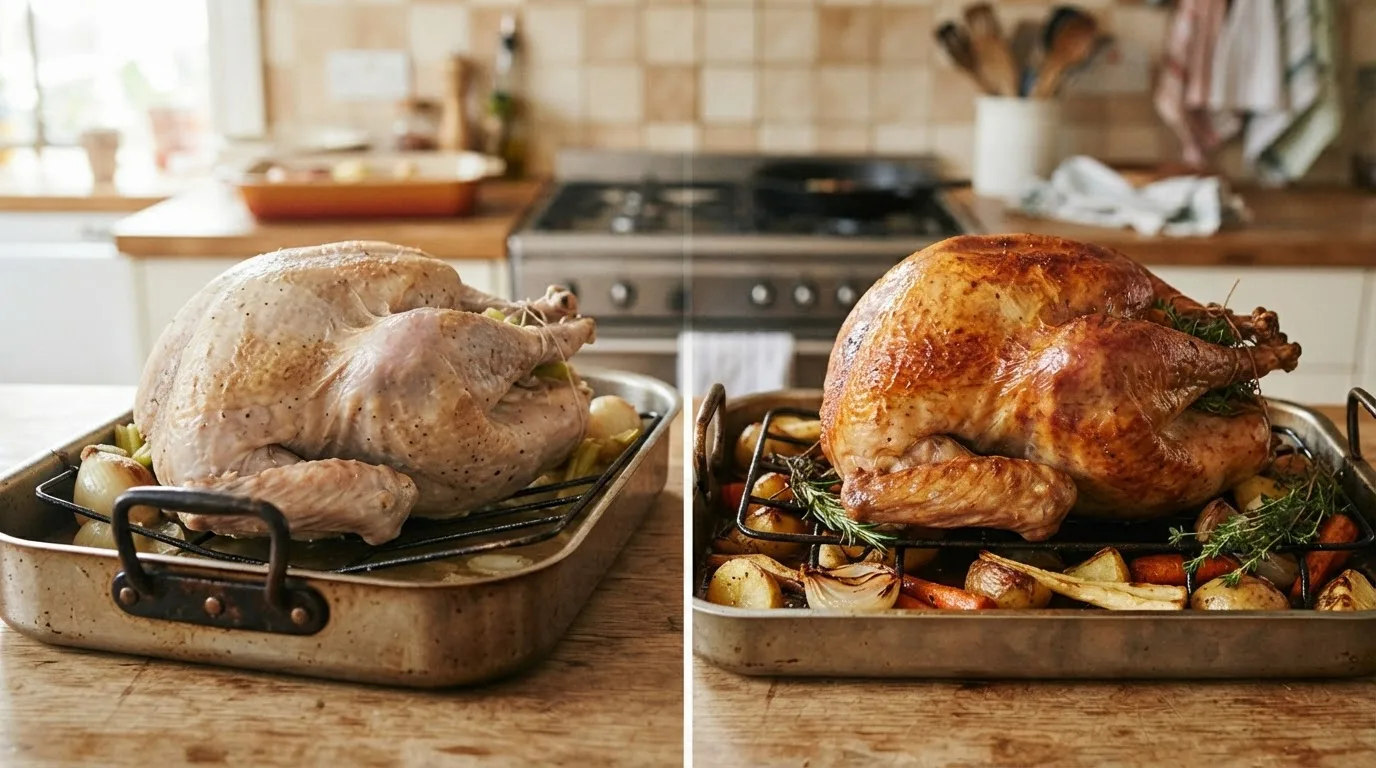
Pale skin is caused by moisture. A wet surface has to steam dry before it can brown.
Fix it next time:
- Dry brine the turkey and leave it uncovered in the fridge so the skin dries out.
- Pat it completely dry before it goes in the oven.
- Remove the foil tent for the last part of the cooking time.
- Don’t cover the turkey tightly while it rests.
The Turkey Is Still Frozen in the Middle
Fix it now: Keep cooking. The turkey will take longer, but it’s safe to cook from partially frozen. Remove the giblets as soon as you can, and check the temperature in several places before serving.
Fix it next time: Start thawing a day earlier than you think you need to.
The Meat Near the Bone Is Pink
Pink meat near the bone doesn’t automatically mean the turkey is undercooked. Younger birds and smoked turkeys often stay pink even when they’re fully cooked. Check the temperature. If it reads 165°F, the meat is safe, whatever its color.
TROUBLESHOOTING FLOWCHART:
- Dry breast → cooked past 165°F → dry brine, tent the breast, check earlier.
- Thighs behind the breast → thighs shielded and lower → spatchcock, or finish the legs separately.
- Pale skin → wet surface → dry brine uncovered, pat dry, remove the foil to finish.
- Frozen center → not thawed long enough → keep cooking, and thaw a day earlier next year.
- Pink near the bone → often normal → check the temperature, not the color.
Your Turkey Countdown
Key Takeaways
- Temperature, not time. The roasting chart helps you plan; 165°F in the thigh, wing and breast tells you it’s done.
- Thaw early. Allow about 24 hours in the fridge for every 4 to 5 pounds.
- Dry brine a day or two ahead for seasoned, juicy meat and crisp skin.
- Bake the stuffing separately, so the breast doesn’t overcook while you wait for it.
- Rest for at least 20 minutes, then carve in the kitchen.
Your Four-Week Thanksgiving Plan
Thanksgiving falls on November 26 this year. Here’s how I’d plan backward from it.
Week 1 (four weeks out): Plan and practice. Decide on the size of turkey and your roasting method. Calibrate your thermometer, and practice by spatchcocking and roasting a whole chicken.
Week 2 (three weeks out): Buy. Buy a frozen turkey, or order a fresh one for pickup 1 to 2 days before Thanksgiving. Check that your roasting pan and rack fit your oven.
Week 3 (the weekend before): Thaw. Move a frozen turkey to the fridge. A 16-pound bird needs about four days, a 20-pound bird five.
Week 4 (Thanksgiving week): Brine and cook. Dry brine on Tuesday. On Thursday, take the turkey out an hour before roasting, follow the timetable as a guide, and trust your thermometer.
Frequently Asked Questions
How long does it take to cook a turkey?
At 325°F, an unstuffed turkey takes roughly 15 minutes per pound, according to the USDA timetable. A 12- to 14-pound turkey takes about 3 to 3¾ hours, a 14- to 18-pound turkey about 3¾ to 4¼ hours, and a 20- to 24-pound turkey about 4½ to 5 hours. A stuffed turkey takes about 15 to 30 minutes longer. A spatchcocked turkey roasted at 425°F cooks much faster, often in about 90 minutes for a mid-sized bird. These times are only estimates. Ovens, roasting pans and turkeys vary, so always confirm doneness with a thermometer in the thigh, wing and breast.
What temperature should a turkey be cooked to?
The USDA’s safe minimum for turkey is 165°F, measured in three places: the innermost part of the thigh, the innermost part of the wing, and the thickest part of the breast. Every spot needs to reach 165°F. For the best texture, I take the breast out at 165°F and let the thighs go to 175–180°F, where their connective tissue becomes tender. If you’re stuffing the bird, the center of the stuffing also has to reach 165°F. Use a calibrated thermometer, keep the probe away from bone, and trust the lowest reading you get.
Should I cook my turkey at 325°F or 350°F?
Either works. The USDA recommends an oven temperature of no lower than 325°F, and its roasting timetable is based on 325°F. A slightly higher temperature, like 350°F, cooks the turkey a little faster and browns the skin more, but it also increases the risk of the outer layers drying out before the center is done. I use 325°F for a whole turkey because it’s more forgiving. For a spatchcocked turkey, which is flat and cooks evenly, I go much higher, to 425°F, for faster cooking and crisper skin.
Do I need to baste the turkey?
No. Basting adds very little moisture to the meat, because the juices mostly run off the skin. Worse, every time you open the oven door, the temperature drops and the turkey takes longer to cook. Basting with liquid can also make the skin soggy instead of crisp. For juicy meat, a dry brine or wet brine does far more. For flavor and browning, rub butter or oil on the skin before roasting, and spread herb butter under the breast skin. If you enjoy basting as a tradition, do it quickly, and only once or twice.
How long should a turkey rest before carving?
The USDA recommends letting a turkey stand for at least 20 minutes before carving. For a large bird, I rest it for 30 to 40 minutes. During that time, the temperature evens out and keeps rising slightly, and the juices settle, so less of the moisture runs out when you carve. A whole turkey holds its heat remarkably well, so it’ll still be hot when you serve it. Cover it loosely with foil while it rests. A tight wrap traps steam and softens the skin. Use the resting time to make gravy and warm your side dishes.
Is it safe to cook a turkey from frozen?
Yes. The USDA says a turkey can be cooked from frozen, but it will take at least 50% longer than a thawed turkey of the same size. Remove the giblet packages partway through cooking, once they’ve loosened, using tongs or a fork. Check the temperature in the thigh, wing and breast just as you would for a thawed bird, and make sure every spot reaches 165°F. Cooking from frozen isn’t ideal, because the turkey doesn’t cook as evenly, and you can’t dry brine or season under the skin. But it’s a safe option if you forgot to thaw it.
Can I stuff the turkey the night before?
No. Never stuff a turkey ahead of time. The stuffing sits inside the cold cavity overnight in moist conditions that can allow bacteria to grow, and once the turkey goes in the oven, the stuffing heats very slowly. You can prepare the stuffing ingredients the day before, but keep the wet and dry ingredients separate and refrigerate the wet ones. Combine them right before stuffing the bird, stuff it loosely, and put it straight in the oven. Even better, bake the stuffing separately in a casserole dish, which is what the USDA recommends.
Why is my turkey still pink when it’s fully cooked?
Turkey meat can stay pink even after it reaches a safe temperature, especially near the bone, in younger birds, and in smoked or grilled turkey. Pinkness can come from the way the meat’s pigments react to heat, or to gases from a smoker or grill. That’s why color isn’t a reliable test. The only way to know whether a turkey is safe is to check the internal temperature. If the thigh, wing and breast all read at least 165°F, the meat is safe to eat, even if it still looks slightly pink.
How much turkey do I need per person?
The USDA recommends about 1 pound of whole turkey per person. That allows for the weight of the bones and gives you a little left over. If you want plenty of leftovers for sandwiches and soups, plan on about 1½ pounds per person. For a boneless turkey breast, about ½ pound per person is enough, since there’s no bone. For a large gathering of more than about 16 people, consider cooking two smaller turkeys instead of one very large one. They cook faster and more evenly, and they’re easier to handle and carve.
How long can leftover turkey stay in the fridge?
According to the USDA, cooked turkey, stuffing and gravy keep for 3 to 4 days in the refrigerator at 40°F or below. Refrigerate leftovers within 2 hours of cooking. Carve the meat off the bone and divide it into shallow containers so it cools quickly. For longer storage, freeze it. Plain turkey keeps its best quality for about 4 months in the freezer, or about 6 months if it’s covered in broth or gravy. When reheating, bring the turkey to 165°F or until steaming hot, and bring gravy to a rolling boil.
Professional Tips for a Better Turkey
THE OVERNIGHT AIR-DRY: After dry brining, leave the turkey uncovered in the fridge overnight. The dry, cold air dries out the skin, so it crisps and browns in the oven instead of steaming.
WHY THE THIGH IS LAST: The thighs sit low in the pan, partly shielded by the body of the bird, and they’re thicker than they look. In many ovens the back is the hottest spot, so turning the bird with its legs facing the back can help them catch up.
USE TWO THERMOMETERS: A leave-in probe in the thigh tells you when to start checking; an instant-read thermometer confirms the breast and wing. Together they take the guesswork out of the timing.
WEIGH, DON’T GUESS: Write down the turkey’s exact weight from the label. Every time and quantity in this guide, from thawing days to salt, depends on it.
Track Your Progress
- Write down your turkey’s weight, thaw start date and roasting method.
- Note the time each test spot reached 165°F, and how far the breast and thigh were apart.
- Record how many degrees the turkey rose while resting.
- Keep your notes with your holiday recipes, so next year starts with your own data.